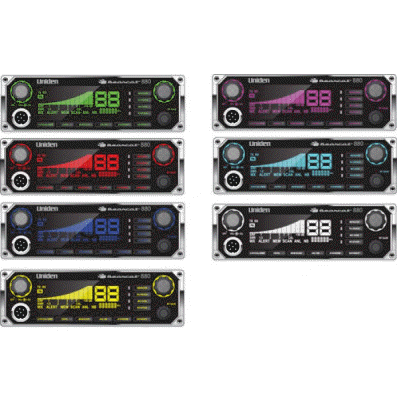
The Most Trusted
Name in CB Radios. It's tough and
powerful with a large
easy-to-read
display and exciting new features
including 7 Color Backlighting,
Noise Cancelling Mic, and Wireless Mic
Compatibility. We
have installed an RFX-95HD on the back
for MORE RF Power output. 15W carrier
and 100W or more of peak power.
That will break through the noise !!!

- RFX-95HD Power Module
- Heavy duty Power cord
upgrade
- ON/OFF Switch in back for
the RFX-95
- 7-Color Backlighting
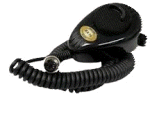
- Noise Cancelling Mic
- Talkback
- Radio Diagnostics
- 6 Pin Noise Canceling Mic
- Wireless Mic Compatible
- Digital SRF / SWR Meter
- Frequency Display
- NOAA Weather
- Squelch Control
- ANL / Noise
- Blanker
- Memory Scan
- RF Gain
- Microphone Gain
- Instant Channel 9/19
- CB / PA
- Channel Indicator
- Includes 6 Pin to 4 Pin
Adapter
- Laser Etched Keys
- Extra Long Mic Cord
- Dimmer Switch Day / Night
View of the front:
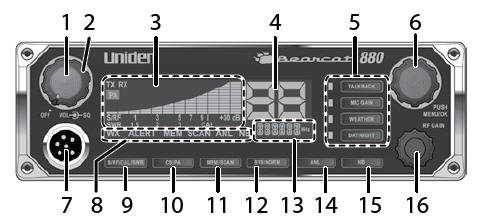
1. Volume Control knob with Power On/Off.
2. SQUELCH knob:
3. S/RF/CAL/SWR Meter:
4. Channel Number display.
5. Operation buttons and associated LEDs:
Talkback:
Talkback lets you monitor yourself
when transmitting.
With Talkback active, press PTT and adjust the volume with
the Volume Control
knob. (Levels 00 - 15)
MIC Gain: Adjusts microphone sensitivity. Delivers
up to 100%
modulation. With MIC Gain active, press PTT and adjust the
gain
levels with the Volume Control knob. (Levels 00 - 04)
Weather: Press to toggle between Weather and CB
channels. Turn
Channel Selector to cycle through the 7 weather channels.
Press and hold to turn Weather Alert on and off. ALERT
displays.
Day/Night:
Adjusts LCD backlight sensitivity
between Day and
Night modes.
6. Channel Selector/MENU/OK. Press the inner MENU/OK button
to
select a menu option or other selection. Turn the outer Channel
Selector knob to:
Select channels
Select menu modes
Change scan resume direction (up or down)
Control Talkback volume
Control Mic gain level
Control Calibration volume
7. Microphone socket.
8. Indicators turn on when the function is turned on.
9. S/RF/CAL/SWR: Push to to check RF signal strength,
calibration,
and SWR reading.
10. CB/PA: Selects CB (Citizens Band) or PA (Public Address).
Do not use the PA function unless an external speaker is
connected.
11. MEM/SCAN: Press to start or stop scanning modes [All Channel
Scan (see page 10) and Memory Scan (see page 12)]. Press and
hold
to set or clear channel memory while in Memory mode.
12. 9/19/NORM: Press to switch between emergency channel 9,
channel 19, and standard CB channels.
13. Frequency Display: Displays the MHz of the selected channel.
Also
displays menu options.
14. ANL: Turns ANL (Automatic Noise Limiter) feature on and off.
ANL reduces external noise.
15. NB: Turns NB (Noise Blanker) feature on and off. NB reduces
interference from vehicle ignition systems.
16. RF Gain knob: Improves reception in strong signal areas.
View of the back:
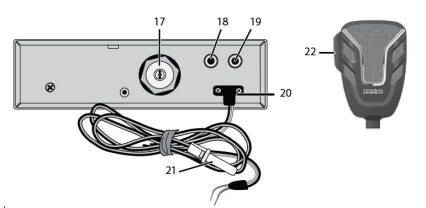
17. Antenna socket: Connects antenna to the unit.
Now on the back of the RFX-95HD
18. PA SP: Connects optional external 8-ohm, 4-watt speaker for
use
as a public address system.
To prevent acoustic feedback, separate the microphone from the
speaker when
operating the PA at high output levels.
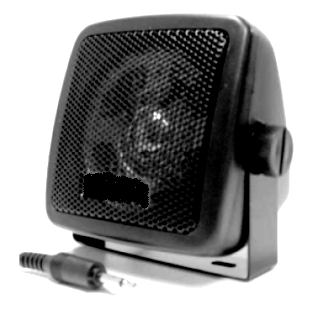
19. EXT. SP: Connects an 8-ohm 4-watt speaker to remotely
monitor
the receiver.
When the external speaker is plugged in, the internal speaker is
off.
20. POWER: Connects DC power to transceiver.
21. Fuse.
22. PTT: Push-to-Talk.
|
|


